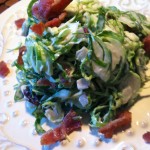
Brussel Sprout Slaw
Happy New Year!
Looking forward to the New Year in a big way. To say that 2012 was a challenge, would be an understatement. I have not shared before, but in July of 2012, Mr. K became unemployed. In the beginning, we thought it would be easy to find employment, but we were very mistaken. By December of 2012, he had applied to over 300 positions, engaged in some interviews and in that said month 1 offer was tendered. A position in Georgia. GEORGIA! Being a Cali girl, this was a sad/scary moment for me. But looking into the area, etc. we came to the conclusion that it would be a nice place to land. Then something else happened, almost simultaneously another job interview was presented, and ultimately an offer was made with a company in Southern California! Nothing for 4+ months, then 2 job offers in one month! Crazy. I do not know if fate, karma or what intervened for us, but it happened and we are staying in California. Yay! So, needless to say, with Mr. K’s new employment, it will be a new beginning for our family in more ways than one.
So with our new beginning ahead of us, I would share a new recipe for Brussel Sprout Slaw. It is excellent as a side dish, maybe serve it with some of your holiday leftovers. This recipe is for a lightly dressed slaw, the Young One likes the slaw a little saucier, so just make your own adjustments depending on how “saucy” you like it. Additionally, I sliced the brussel sprouts with a food processor using the thinnest blade for slicing.
Local Products – Brussel Sprouts, Raisins, Red Onion
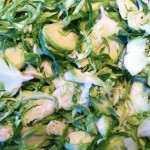
Sliced Brussel Sprouts
- 1 lb. brussel sprouts, sliced
- ½ c mayonaise
- 1 tbsp. sugar
- 1 tbsp. vinegar
- 4 slices bacon, cooked & crumbled (save a little for garnish)
- ¼ c. red onion, chopped
- ¼ c. raisins
- Sunflower seeds
- Combine mayonaise, sugar & vinegar together in bowl.
- Once combined, add remaining ingredients except sunflower seeds.
- Toss until combined.
- Garnish with bacon & sunflower seeds. Season with salt & pepper, if desired.
- Chill & serve.